
Assembly instructions for greenhouses provide a step-by-step guide to building and maintaining your structure․ These manuals ensure proper construction, safety, and functionality, helping you achieve a sturdy, weatherproof greenhouse․
1․1 What to Expect in the Assembly Process
The assembly process involves a series of organized steps, from site preparation to final installation․ Expect detailed instructions for constructing the base, frame, and roof, along with glazing and door installation․ The process requires basic tools and careful attention to safety guidelines․ Each step is designed to ensure structural integrity and proper sealing․ Prepare for a methodical approach that demands patience and adherence to the manual․ Understanding the sequence and requirements upfront will simplify the task and lead to a successful assembly․
1․2 Importance of Following Instructions
Following the assembly instructions is crucial for ensuring the structural integrity and functionality of your greenhouse․ Proper adherence guarantees safety, prevents damage, and ensures all components fit correctly․ Deviating from the guide can lead to instability, leaks, or unsafe conditions․ Clear instructions help avoid common mistakes and save time․ Always follow the manual to maximize your greenhouse’s performance and longevity, and to maintain warranty validity if applicable․ This careful approach ensures a durable and efficient growing environment for years to come․
1․3 Types of Greenhouses and Their Assembly Requirements
Various greenhouse models, such as poly tunnels, walk-in designs, and mini greenhouses, have specific assembly needs․ Polytunnel greenhouses require careful frame construction and secure anchoring, while walk-in models need sturdy base preparation․ Mini greenhouses are simpler but still demand precise panel fitting․ Each type’s assembly varies in complexity, tools, and materials, emphasizing the importance of model-specific instructions․ Understanding these differences ensures proper assembly and optimal functionality tailored to your greenhouse type, whether for small gardens or large-scale growing․

Preparation for Assembly
Begin by selecting a suitable location, preparing the site, and organizing all parts․ Read the manual thoroughly to ensure a smooth assembly process and proper structure setup․
2․1 Tools and Materials Needed
Essential tools include screwdrivers, wrenches, hammers, and drills․ Materials like galvanized steel frames, polycarbonate panels, rubber seals, and fasteners are required․ Ensure all parts are inventoried before starting․
2․2 Safety Guidelines and Precautions
Always wear protective gear like gloves and safety goggles․ Handle glass or polycarbonate panels with care to avoid cuts․ Ensure the site is clear of debris․ Use proper lifting techniques to prevent injury․ Secure the greenhouse firmly to withstand wind․ Follow manual instructions to avoid structural weaknesses․ Keep children away during assembly․ Regularly inspect for sharp edges or loose parts․ Ensure proper ventilation when working inside․ Weatherproof seals are crucial to prevent leaks and damage․
2․3 Reading and Understanding the Manual
Reading and understanding the assembly manual is essential for a successful greenhouse setup․ Familiarize yourself with the parts list, tools required, and step-by-step instructions․ Pay attention to safety guidelines and assembly sequences․ Use the diagrams and images provided to visualize each step․ Ensure all parts are accounted for before starting․ Follow the instructions carefully to avoid errors․ Skipping steps or misinterpreting instructions can lead to structural issues․ Take your time to understand each component’s role and how they connect․ Proper preparation ensures a sturdy and functional greenhouse․ Always refer back to the manual if unsure․
Base Assembly Instructions
Constructing a sturdy base is crucial for your greenhouse․ Use a galvanized steel base, ensuring it is rectangular or square and securely anchored․ Keep it level for stability․
3․1 Choosing the Right Location
Selecting the ideal location for your greenhouse is vital․ Ensure it receives maximum sunlight, ideally in a south-facing area․ Avoid shaded spots to maximize light exposure for plant growth․ The site should be level to prevent uneven settling and water accumulation․ Keep it away from trees to reduce leaf debris and potential damage․ Proper drainage is essential to avoid waterlogging․ Ensure the area is accessible for easy maintenance and assembly․ A well-chosen location enhances functionality and longevity of your greenhouse․
3․2 Preparing the Site
Preparing the site is crucial for a successful greenhouse assembly․ Clear the area of debris, vegetation, and obstructions․ Use a spirit level to ensure the ground is even and firm․ If necessary, excavate and level the site to prevent waterlogging․ A galvanized steel base is recommended for its durability and ability to provide a stable foundation․ Ensure proper drainage to avoid water accumulation, which can damage the structure․ A well-prepared site ensures the greenhouse stands securely and functions optimally, preventing future issues like warping or instability․
3․3 Constructing the Base Frame
Constructing the base frame is essential for a stable greenhouse foundation․ Begin by assembling the corner posts and connecting them with gable end bars․ Ensure the frame is square and level․ Attach triangular end caps to reinforce the joints between corner posts and gable ends․ Secure the base frame using bolts and fasteners provided in the kit․ A galvanized steel base is highly recommended for durability and rust resistance․ Align the frame accurately to ensure proper weight distribution and structural integrity․ This step ensures the greenhouse stands firmly and evenly, ready for further assembly․
3․4 Anchoring the Base to the Ground
Anchoring the base ensures stability and prevents movement due to wind or uneven ground․ Use the provided anchor kit or suitable ground screws․ Position the base frame level and mark anchor points․ Drill into the ground at marked spots and secure the base using bolts or screws․ Tighten all anchors firmly after completing the assembly․ Ensure the greenhouse is fixed according to local building regulations and weather conditions․ Proper anchoring guarantees long-term stability and safety, especially in areas prone to high winds or earthquakes․
Frame Assembly
Frame assembly involves unpacking and organizing parts, assembling side walls, constructing the roof frame, and connecting all sections securely․ Follow the manual for precise instructions and safety․
4․1 Unpacking and Organizing Parts
Begin by carefully unpacking all components from the boxes․ Check the parts list to ensure everything is included and undamaged․ Organize the pieces by category, such as frame sections, fasteners, and glazing materials․ Handle sharp edges with care to avoid injuries․ Lay out smaller parts like bolts and clips in labeled containers for easy access․ Refer to the manual for diagrams that illustrate how parts correspond to the greenhouse model․ Proper organization saves time and reduces assembly errors․ Always double-check the inventory before starting construction․
4․2 Assembling the Side Walls
Start by attaching the side wall panels to the base frame, ensuring they align with the pre-drilled holes․ Use the provided bolts to secure the panels tightly․ Next, connect the top and bottom rails to the side posts, forming a sturdy rectangular frame․ Make sure all corners are square and edges are flush․ Tighten all fasteners firmly but avoid over-tightening, which could warp the frame․ Double-check the alignment before moving on to the roof assembly․ Properly assembled side walls are crucial for the greenhouse’s structural integrity and weather resistance․
4․3 Constructing the Roof Frame
Begin by attaching the ridge bar to the top of the side walls, ensuring it is level and securely fastened․ Next, connect the roof glazing bars to the ridge and eave bars, spacing them evenly as specified․ Use the provided bolts to tighten these connections firmly․ Ensure all joints are aligned properly and the frame is square․ For added stability, cross-brace the roof if instructed․ Double-check that the roof frame is level and sturdy before proceeding to glazing․ Proper construction ensures a durable and weather-tight roof structure․
4․4 Connecting the Frame Sections
Align the frame sections carefully, ensuring all edges and corners match up perfectly․ Secure them using the provided bolts, tightening evenly to avoid warping․ Check that the frame is square by measuring diagonals․ Verify stability by gently rocking the structure․ Ensure all connections are tight and properly aligned․ For added strength, cross-brace if instructed․ Finally, review the manual to confirm all fastening points are correctly secured, ensuring the frame’s structural integrity for the next assembly steps․
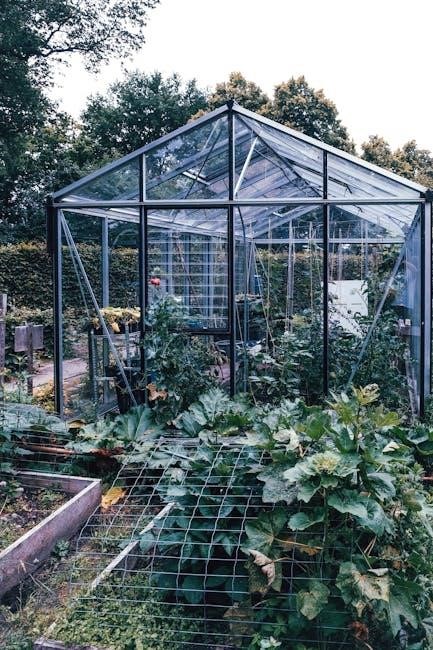
Glazing and Panel Installation
Proper installation of glass or polycarbonate panels ensures a weatherproof seal․ Handle panels with care, securing them firmly to the frame using provided clips and fasteners for durability․
5․1 Handling Glass or Polycarbonate Panels
Always wear gloves and protective eyewear when handling glass or polycarbonate panels to prevent injuries․ Clean the panels thoroughly before installation to ensure clarity and optimal light transmission․ For polycarbonate panels, avoid using abrasive cleaners or sharp tools, as they may scratch the surface․ Glass panels are heavier and more fragile, requiring extra care to prevent breakage․ Store panels in a dry, flat area away from direct sunlight until ready for installation․ Proper handling ensures a smooth and damage-free assembly process․
5․2 Installing the Panels on the Frame
Align each panel with the frame edges, ensuring a snug fit․ Use provided clips or fasteners to secure panels to the frame․ Avoid over-tightening, as this may damage the material․ Start from the bottom and work upward to prevent water accumulation․ Ensure proper alignment to maintain structural integrity and weatherproofing․ After installing, inspect the panels for any gaps or misalignment․ Proceed systematically to complete the installation, following the manufacturer’s instructions for specific panel types, such as glass or polycarbonate․
5․3 Securing the Panels with Clips and Fasteners
Use the provided clips or fasteners to securely attach panels to the frame․ Start by fitting clips along the frame edges, then gently slide the panels into place․ Tighten bolts or screws evenly to avoid warping or cracking․ Ensure clips are spaced evenly for uniform pressure․ Double-check alignment before final tightening․ Avoid over-tightening, as this may damage the panels or frame․ Once secured, inspect the panels for stability and weatherproof sealing․ This step ensures the greenhouse remains durable and weather-resistant, maintaining its structural integrity over time․
5․4 Ensuring Weatherproof Sealing
After installing the panels, inspect all edges and joints for gaps․ Apply weatherproof tape or silicone sealant around panel edges to prevent water infiltration․ Ensure frame joints are tightly sealed, especially at corners and door thresholds․ Use rubber gaskets or weatherstripping for added protection․ Test the seal by spraying water on the exterior to check for leaks․ Regularly inspect and maintain seals to ensure long-term weatherproofing․ Follow specific instructions for your greenhouse model, as sealing methods may vary for glass or polycarbonate panels․ Proper sealing ensures energy efficiency and protects your greenhouse from weather damage․

Door and Vent Installation
Install the door and vents to ensure proper ventilation and access․ Follow assembly instructions for attaching hinges, handles, and securing hardware․ Align components accurately for smooth operation․
6․1 Attaching the Door Frame
Begin by aligning the door frame with the base structure, ensuring it is level and secure․ Use the provided bolts to attach the frame to the base, tightening them firmly․ Refer to the manual for specific bolt locations and torque specifications․ Double-check the alignment to ensure the door will open and close smoothly without obstruction․ Properly securing the frame is crucial for the overall stability and functionality of the greenhouse door system․
6․2 Installing the Door and Handle
Attach the door to the frame using the pre-drilled hinge holes․ Secure it with the provided screws, ensuring proper alignment․ Next, install the handle by screwing it into place on the door panel․ Ensure the handle is tightly fastened for smooth operation․ Check the door’s alignment and test its opening and closing functionality․ Refer to the manual for specific screw locations and torque recommendations to avoid over-tightening․ Proper installation ensures the door operates effortlessly and remains durable over time․
6․3 Adding Roof Vents for Ventilation
Begin by locating the pre-marked vent positions on the roof frame․ Carefully align the vent units with these marks, ensuring they are centered․ Secure the vents using the screws provided, tightening firmly to prevent leaks․ Connect the automatic opener if included, following the manufacturer’s wiring instructions․ Test the vents to ensure they open and close smoothly, providing adequate airflow․ Proper installation enhances ventilation, regulating temperature and humidity for optimal plant growth․ Refer to the manual for specific torque and alignment guidelines to ensure long-lasting performance and weather resistance․
6․4 Ensuring Proper Door and Vent Alignment
After installing the doors and vents, check their alignment to ensure smooth operation․ Verify that doors hang evenly and vents open without obstruction; Tighten all hinges and pivot points securely․ Test the door handle to confirm proper latching and alignment with the frame․ For vents, ensure they close tightly to prevent leaks․ Adjustments may require loosening screws, realigning components, and retightening․ Proper alignment ensures efficient ventilation, weatherproofing, and ease of use․ Refer to the manual for specific adjustment guidelines to achieve optimal functionality and structural integrity․

Final Assembly and Quality Check
Inspect all components for proper alignment and security․ Tighten loose fasteners and verify structural stability․ Test door and vent functionality to ensure smooth operation and weatherproof sealing․
7․1 Tightening All Bolts and Fasteners
Ensure all bolts and fasteners are securely tightened to maintain structural integrity․ Use a wrench or screwdriver to double-check each connection․ Pay special attention to roof and door hinges, as these bear significant weight and stress․ Proper tightening prevents frame shifting and ensures the greenhouse remains stable during harsh weather conditions․ Refer to the manual for torque specifications to avoid over-tightening, which could damage components․ Repeat this process after the first season to account for any settling or loosening over time․
7․2 Inspecting for Structural Integrity
After tightening all bolts and fasteners, inspect the greenhouse for structural integrity․ Check that the frame is square, all panels are securely attached, and the roof is evenly aligned․ Look for any gaps or misalignments in the joints and connections․ Ensure the base is level and firmly anchored to the ground․ Verify that all doors and vents open and close smoothly without obstruction․ Address any issues immediately to prevent long-term damage․ A thorough inspection ensures your greenhouse is safe, durable, and ready for use․
7․3 Testing Door and Vent Functionality
After assembling, test all doors and vents to ensure proper functionality․ Check that doors open and close smoothly, latches secure firmly, and handles operate correctly․ Verify that vents open fully and close tightly to maintain climate control․ Inspect door and vent seals for air leaks, which can compromise temperature regulation․ Lubricate hinges if necessary for smoother operation․ Ensure automatic vent openers (if installed) respond appropriately to temperature changes․ Properly functioning doors and vents are crucial for maintaining a stable greenhouse environment and promoting healthy plant growth․
7․4 Final Cleaning and Touch-Ups
After completing the assembly, thoroughly clean the greenhouse using a mild detergent solution to remove dirt or grease․ Rinse and dry all surfaces to prevent water spots․ Inspect for any remaining debris or manufacturing residues․ Touch up any scratches or areas where the finish may have been damaged during assembly․ Lubricate door hinges and vent mechanisms for smooth operation․ Finally, conduct a walk-through to ensure all components are secure and functioning properly before use․ Ensure all surfaces are clean and dry to maintain clarity and prevent damage․

Maintenance and Upkeep
Regular cleaning, checking for loose parts, and seasonal adjustments are essential to maintain your greenhouse’s structural integrity and functionality․ Ensure all surfaces remain clear and secure․
8․1 Regular Cleaning of Panels
Regular cleaning of greenhouse panels is crucial for maintaining light transmission and preventing algae growth․ Use mild detergents and soft cloths to avoid scratches․ For glass panels, a mixture of water and vinegar is effective․ Polycarbonate panels should be cleaned with specialized solutions to prevent damage․ Avoid using abrasive materials or high-pressure washes, as they can harm the surfaces․ Clean panels ensure optimal plant growth by allowing maximum sunlight penetration․ Regular maintenance also prevents water spots and mineral deposits from forming․
8․2 Checking for Loose Parts
Regularly inspect all bolts, screws, and fasteners to ensure they are tightly secured․ Over time, vibrations and weather conditions can cause parts to loosen․ Use a wrench or screwdriver to tighten any loose connections․ Pay particular attention to roof joints, door hinges, and frame intersections․ Lubricate moving parts if necessary to maintain smooth operation․ Keeping all components secure prevents structural damage and ensures the greenhouse remains stable during harsh weather․ Refer to your manual for specific torque recommendations to avoid over-tightening․ This routine maintenance ensures long-term durability and safety․
8․3 Seasonal Adjustments and Repairs
Perform seasonal checks to adapt your greenhouse to changing weather conditions․ Insulate frames during winter to prevent damage from frost․ In spring, clean panels thoroughly to maximize light entry․ Summer requires ensuring proper ventilation to regulate temperature․ Autumn calls for securing the structure against strong winds․ Address any repairs promptly, such as replacing damaged panels or tightening loose parts․ Regular seasonal adjustments and timely repairs ensure optimal performance and extend the lifespan of your greenhouse, maintaining a stable environment for plants year-round․

Troubleshooting Common Issues
Identify and address common issues like leaks, misaligned frames, or ventilation problems by referring to the manual’s troubleshooting guide for effective solutions and optimal performance and durability․
9․1 Leaks and Water Damage
Leaks and water damage are common issues that can compromise your greenhouse’s integrity․ Inspect the panels and frame connections for gaps or misalignments․ Ensure all sealing clips are securely fastened․ If water seeps through, reapply weatherproof sealants around the edges․ Regularly cleaning debris from the roof can prevent water buildup․ For persistent leaks, consult the manual for specific repair instructions or contact customer support for assistance․ Addressing these issues promptly will help maintain your greenhouse’s structural integrity and prevent further damage․ Always follow the manufacturer’s guidelines for repairs and maintenance․
9․2 Warped or Misaligned Frames
Warped or misaligned frames can weaken your greenhouse’s structure and affect its functionality․ Check for uneven surfaces or bent parts during assembly․ Ensure all bolts and fasteners are tightened evenly․ If frames are misaligned, disassemble and reattach them according to the manual․ For warped frames, contact the manufacturer or replace damaged parts․ Regular inspections and adjustments can prevent further issues․ Proper alignment ensures stability and optimal performance, safeguarding your greenhouse against environmental stressors like wind and rain․ Always refer to the assembly guide for precise instructions on frame correction and maintenance․
9․3 Ventilation Problems
Ventilation issues can lead to excessive heat, humidity, or poor air circulation in your greenhouse․ Ensure roof vents and side windows are installed correctly and functioning properly․ Check for blockages or debris obstructing vent openings․ Clean vents regularly and verify that automatic openers are working as intended․ If manual vents are used, ensure they are fully open during warm weather; Proper ventilation is crucial for maintaining a healthy environment for plants․ Refer to the manual for troubleshooting specific ventilation-related problems and solutions․
Thank you for following these detailed assembly instructions․ For further assistance, visit our official website or contact customer support for additional guides and troubleshooting tips․
10․1 Final Tips for Successful Assembly
Ensure all parts are securely fastened to withstand weather conditions․ Regularly inspect and tighten bolts to maintain structural integrity․ Clean panels periodically to optimize light entry and plant growth․ Proper ventilation is crucial for temperature regulation, so check vents often․ Keep the manual handy for future reference and reach out to customer support if issues arise․ Following these tips will help extend the lifespan of your greenhouse and ensure optimal performance for your gardening needs․

10․2 Where to Find Additional Support
For additional support, refer to the official website or contact customer service via provided phone numbers or email․ Many manufacturers offer downloadable manuals and troubleshooting guides online․ Check the technical help section on the company’s website for detailed resources․ Some brands also provide video tutorials and FAQs․ Reaching out to gardening communities or forums can offer practical advice from experienced users․ Ensure to verify the source for accurate and reliable information to address any assembly or maintenance concerns effectively․
10․3 Downloading the Complete Assembly Manual
Visit the manufacturer’s official website to download the complete assembly manual in PDF format․ Look for the technical support or downloads section․ Ensure the manual matches your greenhouse model, such as GM1302 or PG0101-18․ Some brands offer instant downloads, while others may require registration․ Check the website’s help section for guidance․ If unavailable, contact customer support via email or phone for assistance․ Ensure the manual is printed or saved for easy reference during assembly․