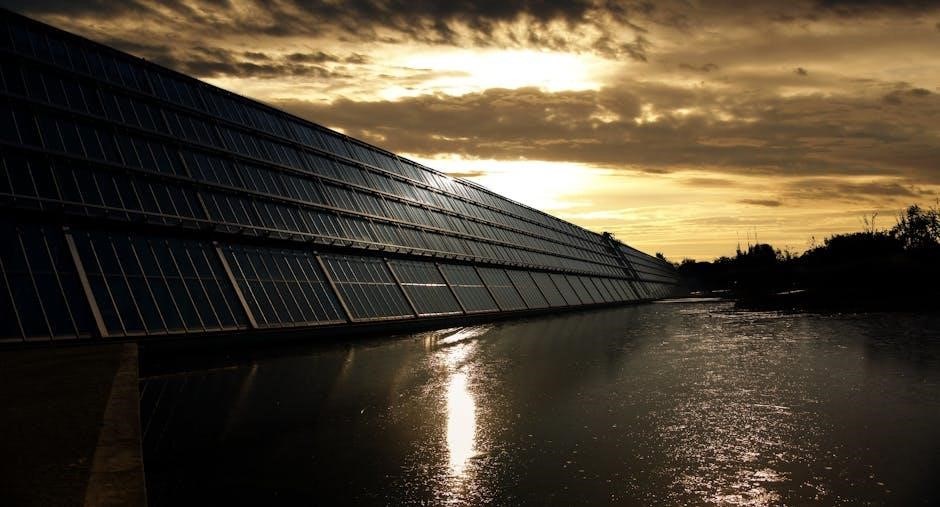
A solar panel wiring diagram is a visual guide that illustrates the electrical connections and components of a solar power system. It provides a clear blueprint for installing, maintaining, and troubleshooting solar setups, ensuring safety and efficiency. These diagrams are essential for understanding how solar panels, inverters, and battery banks interact. They help users wire their systems correctly, avoiding potential hazards and optimizing energy production.
1.1 What is a Solar Panel Wiring Diagram?
A solar panel wiring diagram is a detailed visual representation of a solar power system’s electrical connections. It illustrates how solar panels, charge controllers, inverters, and batteries are interconnected. The diagram provides a clear, step-by-step guide for installing, maintaining, and troubleshooting the system. It includes symbols for components, color-coded wires, and labels for each part. This document is essential for understanding the flow of energy and ensuring safe, efficient connections. It serves as a blueprint for both DIY enthusiasts and professional installers, helping them avoid errors and optimize system performance.
1.2 Importance of Wiring Diagrams in Solar Panel Installation
Wiring diagrams are crucial for solar panel installations as they provide a clear roadmap for connecting components safely and efficiently. They help prevent electrical hazards, such as short circuits or overloads, ensuring compliance with safety standards. Diagrams also simplify the installation process, reducing errors and saving time. By following a wiring diagram, installers can optimize system performance, maximize energy output, and ensure long-term reliability. They are indispensable for both novices and professionals, serving as a visual guide to achieve a successful and safe solar power setup.

Essential Components of a Solar Panel Wiring Diagram
A solar panel wiring diagram includes key components like solar panels, charge controllers, inverters, battery banks, and wiring/connectors. These elements ensure safe and efficient energy flow.
2.1 Solar Panels
Solar panels are the core of any photovoltaic system, converting sunlight into electrical energy. They are typically configured in series or parallel to achieve desired voltage and current levels. Each panel has positive and negative terminals, clearly marked for proper connections. The wiring diagram illustrates how panels are linked to form strings or arrays, ensuring optimal energy output. Proper orientation and mounting are critical for efficiency. The diagram also shows how panels connect to charge controllers or inverters, highlighting the flow of DC power to the system.
2.2 Solar Charge Controller
The solar charge controller regulates the flow of energy from solar panels to the battery bank, preventing overcharging and ensuring efficient energy storage. It acts as a critical interface, safeguarding the system from voltage spikes and reverse current flow. The wiring diagram details the controller’s connections to panels, batteries, and other components. It illustrates how the controller monitors and regulates power, optimizing charging cycles. Whether using MPPT or PWM technology, the diagram provides clear guidance for installation, ensuring safe and efficient energy management.
2.3 Inverter/UPS
The inverter/UPS is a crucial component that converts DC power from the battery bank to AC power for household appliances. It ensures a stable energy supply and protects against power surges. In solar systems, the inverter/UPS also manages grid synchronization in grid-tie setups. Wiring diagrams detail its connections to solar panels, batteries, and loads, ensuring proper installation. The inverter/UPS plays a key role in system efficiency, safety, and reliability, making it essential for both off-grid and hybrid configurations. Proper wiring is critical to avoid damage and ensure optimal performance.
2.4 Battery Bank
The battery bank is a critical component that stores excess energy generated by solar panels for later use. It consists of multiple batteries connected in series or parallel to meet system voltage and capacity requirements. The battery bank ensures a steady power supply during nighttime or cloudy conditions. Proper wiring is essential to maintain energy flow and prevent damage. Battery banks are typically deep-cycle batteries, designed for frequent charging and discharging. They are integrated with inverters and charge controllers to optimize energy storage and release, ensuring reliable performance and longevity of the solar system.
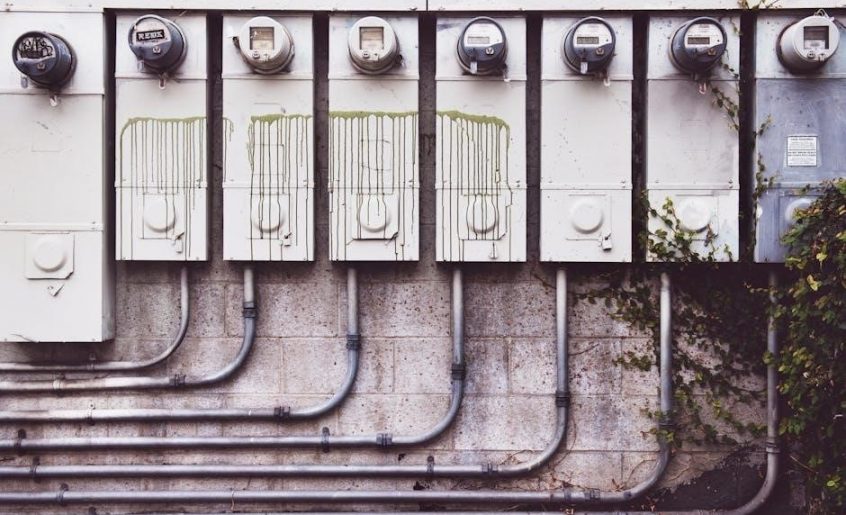
2.5 Wiring and Connectors
Wiring and connectors are essential for ensuring safe and efficient energy flow in a solar panel system. Properly sized wires and high-quality connectors prevent voltage drop and overheating. The wiring diagram specifies the correct gauge and type of wires for each connection, while connectors ensure secure and durable links between components. It’s crucial to use weather-resistant connectors for outdoor installations and to follow proper crimping or soldering techniques. Labels on wires and connectors help maintain clarity and simplify future maintenance or troubleshooting. Always use protective equipment and follow safety standards when handling wiring and connectors.
Types of Solar Panel Wiring Diagrams
Solar panel wiring diagrams are categorized into parallel, series, and series-parallel configurations. Each type illustrates how panels and components connect to optimize energy production and system compatibility.
3.1 Parallel Wiring Diagram
A parallel wiring diagram connects solar panels to a solar charge controller by linking positive terminals together and negative terminals together. This configuration increases the system’s current while maintaining voltage, ideal for low-voltage applications. It allows each panel to operate independently, reducing shading effects. However, it requires larger wires and may increase energy losses. Parallel wiring is commonly used in RV and off-grid systems, offering flexibility and scalability for various setups.
3.2 Series Wiring Diagram
A series wiring diagram connects solar panels by linking the positive terminal of one panel to the negative terminal of the next, increasing the system’s total voltage. This configuration is ideal for high-voltage applications, such as grid-tie systems, and reduces the size of wiring needed. However, it is more susceptible to shading issues, as underperformance in one panel affects the entire series. Series wiring is commonly used in large-scale installations where higher voltage is required to optimize energy production and efficiency.
3.3 Series-Parallel Wiring Diagram
A series-parallel wiring diagram combines the benefits of both series and parallel connections, offering flexibility and scalability. In this configuration, multiple solar panels are connected in series to increase voltage, and these series strings are then connected in parallel to boost current. This setup optimizes energy production and ensures system efficiency. It is commonly used in residential and commercial installations to balance voltage and current requirements. Series-parallel wiring is ideal for systems requiring specific voltage and current levels, making it versatile for various applications, from small RV setups to large-scale solar farms.

Safety Considerations in Solar Panel Wiring
Safety is critical in solar panel wiring to prevent electrical hazards. Use protective equipment, ensure proper isolation, and follow voltage and current guidelines to avoid risks. Always use appropriate protection devices and adhere to protection classes to safeguard the system and users from potential electrical dangers.
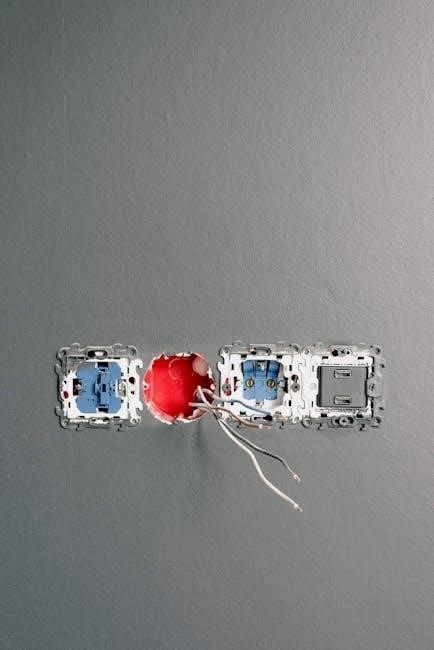
4.1 Protective Equipment and Tools
When working with solar panel wiring, it is essential to use proper protective equipment and tools to ensure safety. This includes insulated gloves, safety goggles, and a voltage-rated multimeter. A DC isolator switch is crucial for disconnecting the system during maintenance. Use high-quality wire strippers and crimping tools to secure connections. Always follow manufacturer guidelines for tool specifications. Proper equipment helps prevent electrical shocks and ensures reliable system performance. Additionally, wire color coding (e.g., red for positive, black for negative) aids in identifying connections, reducing mistakes during installation or repairs. Safety should never be compromised.
4.2 Understanding Voltage and Current Risks
Understanding voltage and current risks is critical for safe solar panel wiring. Solar systems operate at high DC voltages, posing significant electrical hazards. Exceeding the charge controller’s voltage limits can lead to system damage or fire. Always monitor voltage levels during installation and operation. Proper wiring and insulation are essential to prevent short circuits. Be aware of maximum power point voltage (Vmp) and open-circuit voltage (Voc) to avoid overvoltage conditions. Handling live wires without precautions can result in severe electrical shocks. Prioritize voltage and current management to ensure a safe and efficient solar power system. Knowledge is key to preventing accidents.
4.3 Isolation Procedures
Isolation procedures are essential for safely working on solar panel systems. Always disconnect the DC and AC circuits before performing maintenance. Use isolators to separate components like solar panels, inverters, and battery banks. Ensure all power sources are switched off and verify voltage is zero using a multimeter. Install isolators with locking mechanisms to prevent accidental energization. Clearly label isolation points for quick identification. Isolation prevents electric shocks and ensures safe system modifications. Always follow manufacturer guidelines and local electrical codes when isolating solar panel systems. Proper isolation is critical for protecting both people and equipment during servicing.
4.4 Protection Classes and Degrees of Protection
Protection classes and degrees of protection are critical in solar panel wiring to ensure safety and efficiency. These standards, often denoted by IP (Ingress Protection) ratings, define a device’s resistance to dust, water, and other environmental factors. Higher IP ratings indicate greater protection, essential for outdoor solar components. Proper protection classes prevent damage from moisture, pests, and extreme temperatures, ensuring reliable operation. Always select components with appropriate protection ratings for their installation environment. This ensures long-term system performance and compliance with safety regulations, minimizing risks of electrical hazards and component failure.

Step-by-Step Installation Guide
A step-by-step installation guide provides a structured approach to setting up solar panel systems. It outlines assessing requirements, preparing the site, mounting panels, connecting components, and testing the system. This ensures safety, efficiency, and compliance with electrical standards, helping users achieve optimal performance and reliability.
5.1 Assessing System Requirements
Assessing system requirements is the first step in solar panel installation. This involves calculating the total energy demand, available space, and sunlight exposure. Determine the number of panels needed based on their wattage and voltage. Consider the capacity of the battery bank and inverter/UPS rating to ensure compatibility. Evaluate the wiring and connector sizes to handle the current safely. Refer to the wiring diagram and manufacturer specifications for component compatibility. Ensure compliance with local electrical codes and safety standards to avoid hazards and optimize performance.
5.2 Preparing the Site
Preparing the site involves evaluating the area for solar panel installation. Ensure the surface is level, clear of obstructions, and receives adequate sunlight. Check the structural integrity of the mounting location, such as rooftops or ground racks. Verify the site’s electrical connections and grounding system. Remove any debris and vegetation that could obstruct sunlight or interfere with wiring. Ensure proper ventilation to prevent overheating. Use isolators and safety devices to protect the system during installation. Refer to the wiring diagram for specific layout recommendations and safety guidelines.
5.3 Mounting Solar Panels
Mounting solar panels securely is crucial for system performance and longevity. Use durable hardware suitable for the installation type, such as roof racks or ground mounts. Ensure panels are angled correctly to maximize sunlight exposure. Follow the wiring diagram to connect panels in series or parallel. Tighten all bolts and screws to prevent movement. Apply sealants to protect against weather elements. Double-check the alignment and stability before proceeding to wiring connections. Ensure compliance with local building codes and safety standards for a reliable setup.
5.4 Connecting Components
Connecting components requires precision to ensure safe and efficient energy flow. Start by linking solar panels according to the wiring diagram, either in series or parallel. Use appropriate connectors and cables to minimize resistance. Connect the panel array to the charge controller, ensuring correct polarity. From the controller, link to the battery bank and then to the inverter/UPS. Secure all connections with heat shrink tubing or solder. Double-check wiring for accuracy and tightness. Refer to the diagram for specific voltage and current ratings to avoid overloading circuits. Proper connections ensure optimal system performance and reliability.
5.5 Testing the System
Testing the system ensures all components function correctly and safely. Begin by verifying voltage and current outputs using a multimeter. Check solar panel output, charge controller input, and inverter output. Ensure all disconnects and circuit breakers are operational. Test the system under load to confirm energy flow to appliances. Monitor the battery bank’s charge and discharge cycles. Verify proper operation of safety features like isolators and surge protectors. Refer to the wiring diagram to confirm connections match the design. Testing ensures system performance, efficiency, and long-term reliability, while identifying any potential issues early.
Common Mistakes to Avoid
Avoid incorrect series or parallel connections, overloaded circuits, using the wrong wire gauge, and insufficient protection devices. These errors can lead to system inefficiency, safety hazards, or complete failure. Always follow the wiring diagram for proper connections and safety protocols to ensure optimal performance and reliability.
6.1 Incorrect Series or Parallel Connections
Incorrectly wiring solar panels in series or parallel can lead to voltage or current mismatches, reducing system efficiency. Series connections require matching voltages, while parallel connections demand compatible currents. Exceeding charge controller or inverter limits can cause damage. Ensure all panels in a series string have the same voltage rating and that parallel connections use identical panels to maintain balance. Always refer to the wiring diagram to confirm proper connections and avoid system malfunctions or safety risks. Correct configuration is crucial for optimal energy production and long-term reliability.
6.2 Overloaded Circuits
Overloaded circuits occur when the solar system’s current exceeds the rated capacity of wires or components, leading to overheating and potential damage. This can happen if the wire gauge is too small or if too many panels are connected without proper balancing. Overloaded circuits risk damaging inverters, charge controllers, or batteries and may cause fires. To prevent this, ensure all components are correctly sized for the system’s maximum current and use circuit breakers or fuses to protect against overcurrent conditions. Always follow the wiring diagram to avoid exceeding component ratings. Proper planning and sizing are essential for safe and efficient operation.
6.3 Using Incorrect Wire Gauge
Using the wrong wire gauge is a common mistake that can lead to inefficiency, overheating, and even system failure. Thicker wires carry more current, while thinner wires restrict flow, causing voltage drop. Incorrect wire gauge can result in reduced energy output, damaged components, or fire hazards. Always consult the wiring diagram and manufacturer specifications to select the appropriate wire size for your solar system’s current requirements. Proper sizing ensures safe and efficient energy transfer, preventing potential risks and optimizing performance. Verify wire ratings to avoid undersizing or oversizing, which can compromise system reliability and safety.
6.4 Insufficient Protection Devices
Insufficient protection devices can leave your solar system vulnerable to damage from surges, overcurrent, and short circuits. Circuit breakers, fuses, and surge protectors are essential to safeguard components like inverters and batteries. Without proper protection, sudden power spikes or faults can cause irreversible damage, leading to costly repairs. Always install protection devices as specified in your wiring diagram to ensure system safety and reliability. Neglecting these critical components can result in compromised performance, premature failure, or even fire hazards, emphasizing the importance of thorough protection in your solar panel setup.
Reading and Understanding Wiring Diagrams
Reading a solar panel wiring diagram requires understanding symbols, labels, and connections. It visually represents components and their interactions, ensuring safe and efficient installations. Proper interpretation helps identify routes for wiring, voltage levels, and protection devices, minimizing errors during setup. Familiarizing yourself with the diagram is crucial for troubleshooting and optimizing system performance. Always refer to the legend or key provided to decode symbols and connections accurately, ensuring your solar system operates as intended.
7.1 Symbols and Notations
Understanding symbols and notations in solar panel wiring diagrams is crucial for correct installations. Each symbol represents specific components like solar panels, batteries, or inverters, ensuring proper connections. Notations indicate voltage levels, wire gauges, and protection devices, while labels clarify positive and negative terminals. These elements prevent errors and ensure safety. Referencing the diagram’s legend helps decode symbols, making the installation process efficient and secure. Accurate interpretation guarantees the system functions as intended, avoiding hazards and optimizing performance.
7.2 Labels and Markings
Labels and markings in solar wiring diagrams are critical for identifying components and connections. They clarify positive and negative terminals, wire types, and system sections. Common labels include “PV+” for solar panel positives and “BAT-” for battery negatives. Markings like “AC” or “DC” distinguish current types, while color coding highlights live, neutral, and ground wires. These labels ensure safe and accurate connections, preventing errors. Referencing manufacturer instructions helps interpret specific markings, optimizing system performance and reliability while adhering to safety standards.
7;3 Interpreting the Diagram
Interpreting a solar panel wiring diagram involves understanding the visual representation of components and their connections. Start by identifying key elements like solar panels, inverters, and batteries. Follow the flow of electricity from the panels through the charge controller to the battery bank and inverter. Look for labels indicating positive and negative terminals, as well as color-coded wires for AC and DC systems. Refer to the legend or key provided in the diagram to decode symbols and markings. Trace connections carefully to ensure proper installation and troubleshooting, ensuring all components are correctly linked for safe and efficient energy production.

Advanced Solar Panel Configurations
Advanced solar panel configurations include grid-tie, off-grid, and hybrid systems, offering tailored solutions for energy needs. These setups integrate monitoring and control systems for optimal performance and efficiency.
8.1 Grid-Tie Systems
Grid-tie systems connect solar panels directly to the electrical grid, allowing homes and businesses to feed excess energy back to the grid. These systems require specific wiring configurations to ensure safe and efficient energy transfer. A grid-tie solar panel wiring diagram typically includes components like inverters, mounting hardware, and utility meters. The system operates by converting DC power from panels to AC power for grid use. Proper installation ensures compliance with utility regulations and maximizes energy savings through net metering programs. Detailed diagrams guide installers through connections and safety protocols, ensuring reliable performance and grid synchronization.
8.2 Off-Grid Systems
Off-grid solar systems operate independently of the electrical grid, storing energy in batteries for later use. These systems are ideal for remote locations without utility access. A typical off-grid wiring diagram includes solar panels, a charge controller, battery bank, and inverter/UPS. The system charges batteries during daylight and provides AC power through the inverter when needed. Proper wiring ensures safe energy storage and distribution. Diagrams often detail connections for grounding, fuses, and isolation switches, crucial for system reliability and safety in standalone power setups.
8.3 Hybrid Systems
Hybrid solar systems combine solar power with other energy sources, such as batteries or grid connections, to ensure a reliable energy supply. These systems often include advanced components like hybrid inverters and smart controllers. The wiring diagram for a hybrid system illustrates how solar panels, batteries, and grid connections integrate seamlessly. It enables energy storage for off-grid use while allowing grid-tie functionality when needed. Hybrid systems are versatile, reducing reliance on traditional power sources and providing backup during outages; The diagram ensures proper connections and safe operation of the combined energy sources.
8.4 Monitoring and Control Systems
Monitoring and control systems are essential for optimizing solar panel performance and ensuring efficient energy use. These systems utilize sensors, inverters, and software to track real-time data, such as voltage, current, and power output. The wiring diagram for monitoring systems highlights connections between sensors, control units, and communication interfaces. This setup allows users to monitor energy production, detect faults, and adjust settings remotely. Advanced systems integrate with mobile apps, enabling seamless monitoring and control. Proper wiring ensures accurate data transmission and reliable system operation, enhancing overall energy management and efficiency.
Resources and References
Access detailed solar panel wiring diagrams and guides through manufacturer websites, DIY forums, and electrical manuals. Download free PDF resources for specific setups, including RV and off-grid systems.
9.1 Downloading Solar Panel Wiring Diagrams
Solar panel wiring diagrams are widely available online in PDF format, offering detailed schematics for various systems. These diagrams can be downloaded from manufacturer websites, DIY forums, and electrical resources. They often include step-by-step instructions and visual representations of connections for solar panels, inverters, and battery banks. Popular resources provide diagrams for off-grid, grid-tie, and hybrid systems, ensuring compatibility with different setups. Users can find diagrams tailored to specific needs, such as RV installations or residential power systems. Always verify the source and ensure the diagram aligns with your system’s specifications for safe and efficient installation.
9.2 Manufacturer Instructions and Manuals
Manufacturer instructions and manuals are critical resources for understanding solar panel wiring diagrams. These documents, often provided in PDF format, include detailed schematics, installation guidelines, and safety protocols specific to the manufacturer’s products. They typically cover wiring procedures for components like charge controllers, inverters, and battery banks. Additionally, manuals may include troubleshooting tips and compliance information for local electrical codes. Always refer to the manufacturer’s instructions to ensure proper installation and operation of your solar panel system, as they are tailored to the specific equipment and configuration.